
How to Clean Your Pet’s Ears: A Step-by-Step Guide
Keeping your pet’s ears clean is essential for maintaining their overall health. Regular ear cleaning helps prevent infections and reduces discomfort. Here at Peak City Veterinary Hospital, we want to guide you through this simple but important process. Whether you have a dog or a cat, this guide will show you how to safely clean their ears and when to seek veterinary help.
Why is Ear Cleaning Important?
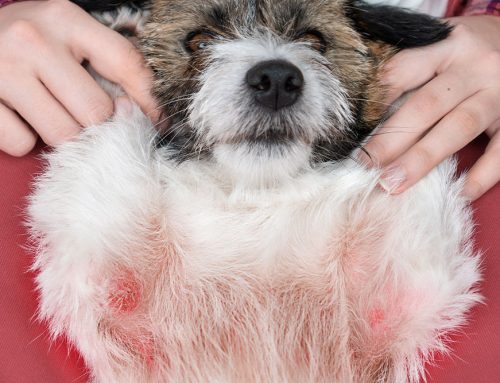
Pets are prone to ear infections due to factors such as ear shape, moisture accumulation, allergies, and ear mites. Cleaning your pet’s ears regularly helps prevent otitis externa, a common condition that involves inflammation of the outer ear canal. This inflammation can be caused by bacteria, yeast, or mites, particularly in animals with floppy ears or those that swim often.
For more on common pet skin conditions and how they relate to ear health, check out our blog on skin conditions.
How to Tell If Your Pet’s Ears Need Cleaning
Before starting an ear cleaning routine, it’s essential to know when your pet’s ears need attention. Here are some common signs:
- Odor: A bad smell coming from your pet’s ears
- Discharge: A waxy or pus-like material in the ears
- Scratching or head shaking: Excessive ear scratching or frequent head shaking can indicate discomfort
- Redness and swelling: These signs point to inflammation
If you observe any of these signs, consider scheduling an appointment with us for a thorough examination. You can request an appointment online.
Step-by-Step Guide to Cleaning Your Pet’s Ears
1. Gather Your Supplies
Before starting, make sure you have all the necessary supplies:
- Ear cleaner: Use a veterinarian-recommended solution. Avoid using hydrogen peroxide or alcohol, as they can irritate sensitive ear tissue in dogs and cats.
- Cotton balls or gauze: Avoid using cotton swabs (Q-tips), as they can push debris further into the ear canal.
- Towel: This will help you hold your pet still, especially if they are nervous.
2. Position Your Pet
Make sure your pet is comfortable. For larger dogs, you may want to sit behind them while they are sitting or standing. For smaller dogs and cats, having them on your lap may be easiest.
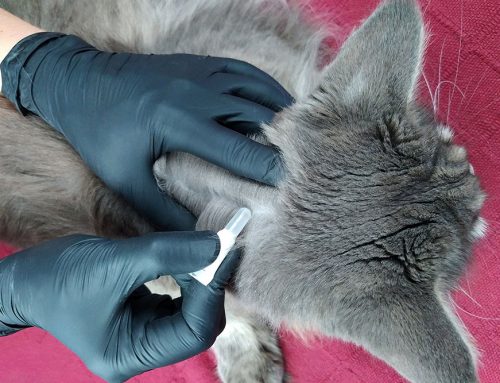
3. Apply the Ear Cleaning Solution
Hold the ear flap (also called the pinna) upright and gently squeeze the ear cleaning solution into the ear canal. Do not insert the tip of the bottle into the ear, as this can introduce bacteria.
4. Massage the Ear
Once the solution is in the ear canal, gently massage the base of the ear for about 30 seconds. You should hear a squishing sound, which means the cleaner is dislodging debris and wax.
5. Let Your Pet Shake
Allow your pet to shake their head to help remove the debris and cleaning solution from the ear canal. You may want to hold a towel over their head to catch any splatter.
6. Wipe the Ear
Using a cotton ball or gauze, gently wipe away any debris from the outer ear canal. Avoid going too deep into the ear, and never use a cotton swab to clean the canal itself.
7. Repeat If Necessary
If the ear still looks dirty, you may need to repeat the process. However, be cautious not to over-clean, as excessive cleaning can cause irritation and predispose to additional infections
8. Reward Your Pet
Don’t forget to reward your pet with a treat for being patient throughout the process!
How Often Should You Clean Your Pet’s Ears?
For most pets, cleaning the ears once a month is sufficient. However, pets with floppy ears, such as Cocker Spaniels, or those prone to ear infections may need more frequent cleaning—around once a week.
When to See a Vet

Sometimes, regular ear cleaning isn’t enough to solve the problem. If your pet is showing signs of an ear infection, such as:
- Severe redness or swelling
- Persistent odor or discharge
- Crusty or thickened skin around the ear canal
- Pain when touching the ears
It’s time to schedule a veterinary visit. Untreated infections can lead to serious complications like otitis media (middle ear infections), which can result in hearing loss or balance issues. At Peak City Veterinary Hospital, we can help diagnose and treat underlying issues with medicated ear cleansers or prescription ear drops tailored to your pet’s needs.
Conclusion
Cleaning your pet’s ears doesn’t have to be a stressful experience. By incorporating regular ear cleaning into your pet’s grooming routine, you can help prevent infections and maintain their ear health. However, always monitor for signs of infections or other issues and consult your veterinarian if you are unsure.
For further advice or to schedule a consultation, feel free to contact us. We’re here to ensure that your pet stays happy and healthy!

Leave A Comment